A few days ago, when writing about the book, Comfort Quilts from the Heart by Jake
Finch, I mentioned I’d never made a wheelchair quilt with a footwarmer (she
also calls them “Foot Pocket” – I like that!).
Anyway ~ I have now!
Remember the article, My Own Flare? Seldom do I follow pattern directions. Well, this is certainly a
prime example!
Honestly, I didn’t follow the “pattern” because I was in a
rush to get it made. I wanted to take it to Dallas to show my mother. Plus, I wanted to get
out her wheelchair from storage, and have her model it for me! It was the
plan to take pictures to share with you! It worked!
This is also a good example how you can make things your own as well!
I took the basic overall measurement (for an adult) that
Mrs. Finch decided upon – 36” x 60” – and went from there.
Had I had some nice scenery fabric in my stash like she
shows ~ and had had the time ~ I would have followed along and learned her
paper-pieced flying geese technique. The how-to for the checkerboard and rail
fence rows seem pretty straight forward. Again, I was in a rush and simply used
straight “blocks” rather than piecing anything.
NOTE: Not all rows need to be the same height (notice hers are not
the same height). The rows just need to total 54.5” when put together – before
adding the 3.25” border. If you want to add a different size border, which I
highly recommend on this quilt that you do have a border, you’ll have to do a
little math.
Bottom line ~ any “block” design you want to do per row ~ go
for it!
But, if you want to make one like I did, this is how!
Cut for main
body of quilt:
9 - coordinating pieces of fabric – 6.5” x WOF (Width of
Fabric)
Cut for border:
ONLY PRE-Cut these measurements
if YOU take ¼” seam allowance throughout!!!
Otherwise WAIT and measure your
quilt in the center* - both ways!!!
2 (top/bottom) – 3.25” x 30.5”
2 (sides) – 3.25” x 60.5”
Cut for binding:
While cutting out the fabric for the quilt top & border,
I went ahead and cut 2.5” x WOF strips for the binding. This is how I figured
out how much I would need:
60
|
||
60
|
||
36
|
||
36
|
||
192
|
total
inches
|
|
/36
|
inches
per yard
|
|
5.3
|
yards
needed
|
|
Based on the MS Excel figures, I cut the WOF 5 times (since
it’s 44-45” wide I would have plenty). To prepare the binding, check out this
article McCall’s Quilting shared!
Sewing it
together:
I arranged the pieces together like I wanted on my ironing board,
right next to my machine.
I picked up the first two & stitched ~ right sides
together ~ the entire WOF.
I stitched (right sides together) the next “set” of two and
continued this process without stopping/cutting threads until I had all the
sets stitched. It was then I snipped them apart.
I pressed
the stitches to “meld” the threads together, then began cutting each “set” to
the proper length.
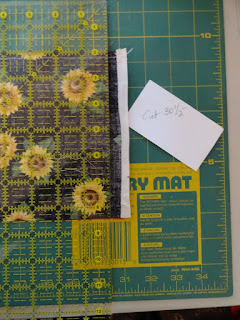
- First, I made certain one end extended a tad beyond the cutting mat.
- Then I cut at the 30.5” line
- I flipped the “set” around, lining up the left nicely cut end with the far left line on the mat and cut the opposite end to length – taking care of that end’s selvages.
NOTE: This is the ONLY time I use
my cutting mat for measurement purposes! I also jotted down how long to measure
on a scrap piece of paper to keep right next to the fabric so I wouldn’t have a
senior moment and cut the wrong length!
Continue until all "sets" are cut to length!
Save
the long cut off end sets!!!
I placed the 30.5” long “sets” back on the ironing board in
their original order. At this time, I pinned all the sets together, adding the
top and bottom border to stitch as a “row” as well.
Once I stitched together all the rows, I pressed the seams
to “meld” the stitches, then pressed all the seams up (or down) whichever you
prefer! I would not press the seams “open” as the “togetherness” gives more
strength to the seams.
At this time, I pinned the side borders to the quilt, being
careful not to pull the stitches out at the end of the rows. The side borders
fit perfectly! I stitched them down, then pressed to meld the stitches. I then
pressed the seam toward the border to reduce bulk!
I got the binding ready!
I got the binding ready!
The top was ready to quilt! I loaded it in my longarm, and
got it done very quickly doing a large loopy design all over.
NOTE: The pattern called for
flannel backing. I do not prefer flannel backing for adult quilts… it’s too hot
in the Texas Hill Country for 75% of the year! I simply used regular 100% quilt
quality cotton for the backing. The batting used was Hobbs Heirloom Premium =
80% cotton, 20% polyester.
Tomorrow I’ll share how I did the foot warmer – aka Foot
Pocket – and finished the wheelchair quilt!


Love this! Thanks for sharing Lanetta!
ReplyDeleteYou are very welcome, SueEllen!
DeleteI hope it helps in your mission.