Wednesday, October 14, 2020

Inspirational Crochet

Over the past several months, I’ve spent any spare time I can muster working on crochet projects! I’m truly hooked! When doing other things, especially driving the 50 miles to town and back, I think about crocheting.

From the beginning of keeping this blog, I’ve shared links to what I believe are fabulous websites, youtubers, and facebook pages to everyone/anyone that visits here. When something and/or someone comes along I’ve found inspirational, I always want to share!  

That’s the case with Canadian Michael Sellick. 

I was on Youtube looking up how to do Tunisian Crochet and discovered Mikey

Besides finding a fabulous reference for all things crochet, specifically Tunisian style crochet, I took the time to watch his video “Mikey Learning to Knit – Outtakes” and it’s then I discovered his amazing laugh/giggle! It’s soooooo contagious! Hearing him laugh/giggle never fails to bring a smile to my face and makes me laugh as well! What a splendid relief!

Since that day I’ve visited his website and have liked his all things Facebook. His Facebook page is The Crochet Crowd.

The kicker for writing this article after missing months, I wanted to share, once again, something I find inspirational. On his Facebook group, The Crochet Crowd Stitch Social, back on October 11th, Michael posted the following: 

One of my favourite activities for in-person workshops is blind-folded crochet. People may not realize we have several community members who are blind. We realized this during one social visit to JOANN. The young lady was telling me that the explaining in the video of what I am doing is really good for her. While to someone who can see what I am doing, may leave a comment for me to get on with it, for someone blind, they need that extra explanation.

Why I love this activity is that the blind-folded person has a coach to help them along to be their eyes. To communicate the steps and motion to do with the hook should the crocheter be lost in their stitchwork. It's team-building.

This is also a group where other hookers share their projects… so inspirational!  

If you are into crochet (or want to be!), I highly recommend checking out Michael Sellick! 

And, anytime you need to laugh, or giggle, take a dose of Mikey!

Saturday, May 9, 2020

Attitude Adjustment

Somewhat fretting over some mistakes I made in a crochet shawlette I created for Momma’s Mother’s Day gift, a friend asked me...

Have you ever heard of the Native American custom of purposely making a mistake in a blanket or other article, so as to not anger the gods with a "perfect" human-made thing?

This intrigued me to look it up and I discovered it is a common Navajo tradition. Their “imperfections” are purposeful because only God is perfect. Of course!

Rather than always seeking perfection, other cultures also have the same attitude. I like this.

One of the first major projects I ever worked on was a poncho for my sister’s Christmas gift. I think I might have been 14 or 15 at the time. I don’t really remember. It doesn’t matter. My aunt came in from Arkansas for a visit and I excitedly shared the half-finished project. Actually, I think I was almost through with it at the time. Well, she found a mistake way back near the beginning and began ripping it all out!!! I stood there absolutely stunned as she told me, “If you can’t do something right, don’t do it at all.”

Her voice continually plays in my head, until this morning.

From now on, as I’ve always done, I will do the best I can.
                   
Maybe someday I will make the “purposeful” mistakes rather than the oops! But until then, I won’t be so hard on myself that it’s not “right” - not “perfect.”

Thank you, Gail!


Saturday, April 4, 2020

Tweaking Face Masks - UPDATED


After researching and reading this and that, I’ve come up with the following method of making face masks:
   
Fabric
Pipe Cleaner (8") (to bend over the nose and cup the cheeks)
Elastic - please, no larger than 1/4" wide for the sake of the ears! ACTUALLY 1/8" IS BEST - YOU CAN TRIM 1/4" TO 1/8" EASILY! Just like you can trim 1/2" wide elastic to 1/8"

Cut main fabric 9" x 16"
Cut from main fabric for facing 9" x 1.5" then cut in half to make 4.5" x 1.5"
Cut 2 pieces of elastic 7" long

With wrong side facing up on ironing board, fold both ends of large piece about ½" and press.


With right sides together, pin, then stitch along the pressed fold about 1.5" - reinforcing at the 1.5" mark. This will keep seam from coming apart when folks insert their coffee filter.


Press seam open.


Turn tube right side out.

Place opening near the top and press folds above and at the bottom.


Take to machine, open up and carefully stitch 1/4" from bottom fold (of the opening). I can only stitch a few stitches before I have to readjust, making sure I don’t catch extra fabric underneath!


Then take the tube and find the pressed top fold. Stitch through all layers to make a tube for the pipe cleaner.


Insert pipe cleaner. Leave at least 1 inch from the end. Use wire cutters and cut the pipe cleaner. Scoot the pipe cleaner down where both ends have about ½" of NO pipe cleaner! You do not want to stitch over the wire because it might just break a needle (or dull it)!


Take back to ironing board. Give the over all (now 9" x about 7.5") piece a good press.


Working on the ironing board, with the front facing up and the pipe cleaner tube is on top, make the first fold.


Press each fold as you go. You’ll have three nice folds about ½" deep.

Pin folds in place (I’ve drawn too much blood pinning the folds as I go!)


The last hanging down part, I pin underneath (backwards) for really the 4th fold, to cup underneath the chin better.

From the front, pin the elastic in place, making sure not to twist.


From the front, pin the facing in place on each end right sides together, wrapping the ends around to the back. *Stitch through all layers using 1/4" seam allowance (Double Check Where the Pipe Cleaner Is!!!!).


Double stitch over the elastic a couple of times to reinforce!

*Don’t forget to remove pins as you stitch, before stitching over them!!!


Take back to ironing board and press stitching to set. Pull out facing and press folded a rounds, then about 1/4" along the edge. Fold over, then stitch in the ditch.


Ta Da!!!

Monday, January 13, 2020

Crochet Techniques

This past Saturday I joined a group of lovely ladies that gather and work on various craft projects. Yes! We all brought our own projects and visited while working. It was also an opportunity to share or get help or advice on a project such as how to repair a tapestry edging, how to do a particular stitch, or how to scrapbook inside a journal bible.

I had a marvelous time - until I discovered my hearing aid was missing!

This was after having breakfast with Gail at Mi Casa, a local restaurant, then her showing me how to do a foundation chain and single crochet at once and then working for about an hour or so on Bud’s afghan! It was only then I went to adjust the aid and discovered it was not in my ear!!!!

Long story short... I was in a rush to leave the house. I had taken it out to brush my hair while Anna ~ the doberman ~ wanted to go outside one more time before I had to leave. In my haste, I left it on the table outside. The cats found it and thought they had a new chew toy.

Oh well.

Things happen.
Anyway... Gail went to a website that had a clear video of how to do this technique. It took me several times at home to master the Foundation Single Crochet stitch, but  I finally got the method and will use it the next time I start a project that may need to be increased to fit! I won't chain x number of times, then single crochet back, only to discover it's not long enough!

Since then I’ve looked further on the Moogly site and have found a bucket load of tutorials for right and left handed crocheters!

This morning I got some scrap yarn and learned another technique! I’ve always hated the hole a “chain 3 then turn” leaves in the work. If you are a crocheter, you know what that means! Check out the “Improved Chainless Starting Double Crochet” video (one for right handed, another for left handed). You’ll never go back!


Friday, January 3, 2020

Still Hooking


I hope everyone’s New Year is off to a great start!

Lanetta’s Creations is much more than sewing, quilting, etc. As I mentioned last time, I am working on a few creative endeavors!

It’s during the early morning, before morning chores begin, rather than working online jigsaw puzzles, I crochet a detailed pattern. Yes. Bud’s afghan is still a work in progress. It’s the project I work on at night, after supper, while watching television. It’s a “mindful” pattern. The repetitive stitches allows me to know what’s happening in the program we’re watching! Win-win!

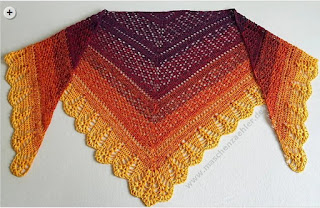
My current project for the early morning is the Erigencia shawl by Silke Terhorst I found on Ravelry.


When Mother, Gail & I visited Hobby Lobby last week, I found the perfect yarn for it! I don’t know why they named it “Cloud Control” as it’s a pewter to me!

I’ve never before read a “chart” - the universal language! But because of a YouTube creator showing me/us how, I now wonder if I’ll ever be able to follow the written directions! This lady is amazing... all the way from Kenya she has over 83 THOUSAND followers... because she explains and demonstrates things very nicely! I highly recommend The Secret Yarnery!

I would not have been able to create the Mobius Shawl without the help of Youtuber Fiber Spider!  He was great and I finished the snow white shawl in time to wear it to a special dinner! It wasn’t long enough to suit me, but okay for that evening. I bought another skein and will add to it... someday!

Oh, and I came across some lovely shawl pins at the Crafty Flutterby Creations! So many to choose from, I can't decide!


Back to hooking before the sun comes up!


Total Pageviews