Showing posts with label wheelchair quilt. Show all posts

Friday, October 9, 2015

Let Others Know!

In my blog articles, I focus on the positive. Providing inspirational ideas, creative suggestions to get the juices flowing, and thoughts to ponder, it is the reason I write. From comments left on my personal Facebook wall & Lanetta’s Creations page, and the handful left here, I know people stop by on occasion and read what I’ve shared.

That’s fabulous!

I’m wondering, though, what does it take to get folks to “share” one of my articles? Maybe they aren’t particularly interested in whatever it is I’ve created.

But, for example, a wheelchair quilt with a foot pocket ~ maybe one of their friends or family members may, if they knew about it!

Or, at least, want to know someone who could make one for a Loved One! ~~~~ Me!


When I share an Action Quilt (aka Fidget Quilt) I’ve made, it absolutely breaks my heart when I hear:

“I wish I had had one for my (insert Loved One) before (s)he died.”

Recently, I had a lady place an Action Quilt on her lap and fiddled with the different doo-dads. Tears filled her eyes as she told me, “Oh, I wish my Daddy had had this before he died.”


I’ve said it many times: I’m always late to the party.

But, I’m here now.

I just need to figure out how to get others that know, let others know!


Thursday, September 24, 2015

Wheelchair Quilt - Done!

Yesterday I showed how I took the idea Jake Finch shared in her book, Comfort Quilts from the Heart, and made it a bit different.

Now that I’ve finished quilting the quilt top, I’ll share how/what I did for the footwarmer (aka foot pocket)!

The single piece of flannel I had that would go nicely with the print (after straightening up the edges) was only 15 3/4” x WOF. I decided I would make it work! I was under a time crunch, remember!


I trimmed off the selvage from one end of the flannel.

I don’t work with flannel very often as it’s much too hot to touch, unless it is in the dead of winter! When I came across this piece in my stash, the thinness and stretchiness of it, and thinking how folks will be putting their feet in there, then the feet will be pressing against the wheelchair foot rest, I just thought it needed a bit more wear protection.

Remember the long “extra” pieces I cut off each row set, the WOF (Width of Fabric)? I stitched them together in rows, like I did the quilt front. After pressing the stitches to meld, then pressing the seams all going in the same direction, I trimmed, leaving as much as I could, which turned out to be only 11.5” by the WOF.


I placed the 15 3/4” x WOF flannel (minus one end’s selvage) down on my cutting mat, smoothing it out nice and neat. I then carefully placed the pieced section (right side down – if there is a right/wrong side to flannel, I didn’t see it!) at the cut selvage end. Careful not to stretch the flannel, or the pieced section, I began generously pinning across the top.


 Once I got to the end, and had all the excess flannel left, I trimmed it off.


It was then I stitched the two pieces together. I pressed the stitches to meld (using low heat as the flannel didn’t seem to like a hot iron!), then pressed the seam toward the flannel.

I flipped the pieced section over with the right side out, then matched the bottom raw edge, and sides, pinning together. You’ll notice I now have about a 2” red flannel “top” to the foot warmer. After pinning the ends, and bottom together, I then stitched within the seam allowance, just for it to hold together nicely. I also stitched across the bottom of the red.


Although I mentioned in a prior article, I don’t trim until I’ve stitched the binding on the quilt for the first time. In this case, I had to trim just around where I was going to attach the footwarmer. Again, I used lots of pins to keep it in place. I did go ahead and stitch it to the quilt, rather than to try and sew it along with the binding.


The quilt top measured 36.5 across, but after quilting, it shrunk up two inches! So I had to trim 1” off both ends of the pieced section for the footwarmer.


After stitching the footwarmer to the bottom of the back of the quilt, I attached the prepared binding like any other quilt.

When I held up the Wheelchair Quilt, I personally didn’t like the big gaping footwarmer. I decided to hand-stitch about 2” on the red part, dead center, with the same thread I used in the quilting.


Momma loves the way it turned out. I asked if there was anything she would / could see done differently in the future. She thought it was perfect!


Thank you, Jake Finch, for the inspiration!

Wednesday, September 23, 2015

Chair Bound

A few days ago, when writing about the book, Comfort Quilts from the Heart by Jake Finch, I mentioned I’d never made a wheelchair quilt with a footwarmer (she also calls them “Foot Pocket” – I like that!).

Anyway ~ I have now!


Remember the article, My Own Flare? Seldom do I follow pattern directions. Well, this is certainly a prime example!

Honestly, I didn’t follow the “pattern” because I was in a rush to get it made. I wanted to take it to Dallas to show my mother. Plus, I wanted to get out her wheelchair from storage, and have her model it for me! It was the plan to take pictures to share with you! It worked!

This is also a good example how you can make things your own as well!

I took the basic overall measurement (for an adult) that Mrs. Finch decided upon – 36” x 60” – and went from there.

Had I had some nice scenery fabric in my stash like she shows ~ and had had the time ~ I would have followed along and learned her paper-pieced flying geese technique. The how-to for the checkerboard and rail fence rows seem pretty straight forward. Again, I was in a rush and simply used straight “blocks” rather than piecing anything.

NOTE: Not all rows need to be the same height (notice hers are not the same height). The rows just need to total 54.5” when put together – before adding the 3.25” border. If you want to add a different size border, which I highly recommend on this quilt that you do have a border, you’ll have to do a little math.


Bottom line ~ any “block” design you want to do per row ~ go for it!

But, if you want to make one like I did, this is how!

Cut for main body of quilt:

9 - coordinating pieces of fabric – 6.5” x WOF (Width of Fabric)

Cut for border:
ONLY PRE-Cut these measurements if YOU take ¼” seam allowance throughout!!!
Otherwise WAIT and measure your quilt in the center* - both ways!!!

2 (top/bottom) – 3.25” x 30.5”
2 (sides) – 3.25” x 60.5”


Cut for binding:

While cutting out the fabric for the quilt top & border, I went ahead and cut 2.5” x WOF strips for the binding. This is how I figured out how much I would need:

60


60


36


36


192
total inches
/36
inches per yard
5.3
yards needed


Based on the MS Excel figures, I cut the WOF 5 times (since it’s 44-45” wide I would have plenty). To prepare the binding, check out this article McCall’s Quilting shared!

Sewing it together:

I arranged the pieces together like I wanted on my ironing board, right next to my machine.


I picked up the first two & stitched ~ right sides together ~ the entire WOF.


I stitched (right sides together) the next “set” of two and continued this process without stopping/cutting threads until I had all the sets stitched. It was then I snipped them apart.


I pressed the stitches to “meld” the threads together, then began cutting each “set” to the proper length.
           
  1. First, I made certain one end extended a tad beyond the cutting mat.

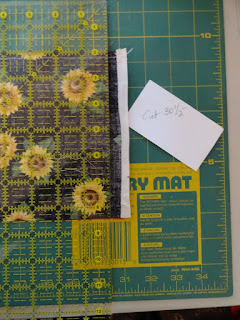
  1. Then I cut at the 30.5” line

  1. I flipped the “set” around, lining up the left nicely cut end with the far left line on the mat and cut the opposite end to length – taking care of that end’s selvages.


NOTE: This is the ONLY time I use my cutting mat for measurement purposes! I also jotted down how long to measure on a scrap piece of paper to keep right next to the fabric so I wouldn’t have a senior moment and cut the wrong length!

Continue until all "sets" are cut to length!

Save the long cut off end sets!!!

I placed the 30.5” long “sets” back on the ironing board in their original order. At this time, I pinned all the sets together, adding the top and bottom border to stitch as a “row” as well.

Once I stitched together all the rows, I pressed the seams to “meld” the stitches, then pressed all the seams up (or down) whichever you prefer! I would not press the seams “open” as the “togetherness” gives more strength to the seams.

At this time, I pinned the side borders to the quilt, being careful not to pull the stitches out at the end of the rows. The side borders fit perfectly! I stitched them down, then pressed to meld the stitches. I then pressed the seam toward the border to reduce bulk!

I got the binding ready!


The top was ready to quilt! I loaded it in my longarm, and got it done very quickly doing a large loopy design all over.

NOTE: The pattern called for flannel backing. I do not prefer flannel backing for adult quilts… it’s too hot in the Texas Hill Country for 75% of the year! I simply used regular 100% quilt quality cotton for the backing. The batting used was Hobbs Heirloom Premium = 80% cotton, 20% polyester.


Tomorrow I’ll share how I did the foot warmer – aka Foot Pocket – and finished the wheelchair quilt! 

Total Pageviews