Showing posts with label sewing. Show all posts

Wednesday, September 21, 2016

Following Instructions

When working on a quilt top, I don’t understand why I have such an issue following written instructions for a specific pattern/design. But, I do. Something in my brain clicks and it’s like the pattern is written in Greek rather than plain English! I know it’s me because others follow the same instructions and it works!

Let me study a photo of the block. I usually can figure out how to create it without any problems.

I saw this photo on Facebook the other day…


It gave me a good laugh, and reminded me, how many disasters I’ve created due to not following the instructions!

But, it’s not a total loss! I keep going, modifying and changing until it works out some way – some how! Maybe not like the original design. What I end up with is a new design!

I tried making the “Quilt for a Better Tomorrow” I wrote about the other day…

It didn’t work out. I ran out of fabric! When I made 6 blocks, I knew I would not have enough of the listed yardage requirements of fabric (purchased on our road trip) to make 6 additional blocks! It’s then I stopped trying and created a sashing and cornerstone between the blocks. Now I need more of the black fabric to do along the sides – before adding side borders.


I just couldn’t figure out the instructions to create the flying geese section. So, I did the “flying geese” like I knew how… which ate up the last bit of the black fabric.

Now I have bunches and bunches of the black half square triangles the instructions said to cut. I’ll figure out something to do with them!

I’m not going to give up on the original design! One day soon I’m hoping to get someone else to read the instructions and show me how, and what I did wrong!

Bottom line, when you get a kit of any type… follow the instructions to avoid a disaster!

Fortunately, while sewing for the experience, a disaster can easily be turned into a new design!


Monday, September 12, 2016

The Hidden Benefits of Sewing

It’s interesting – and timely – that I happened across the article Sew Your Blues Away! – How Sewing Fights Depression from So Sew Easy.


I also went to the CNN article they referenced: This is your brain on crafting. This is what the CNN contributor listed as the story highlights:

  • Crafting can help those who suffer from anxiety, depression or chronic pain, experts say
  • It may also ease stress, increase happiness by releasing neurotransmitter called dopamine
  • Leisure activities such as reading and crafting may protect brain from aging, study finds

Not long ago, I had asked a group (via a small closed Facebook group of real-life girlfriends), how they handled bouts of depression. I am blessed to have received various answers, wonderful helpful insights from my friends. Two suggestions won the majority:

1.      Laugh more
2.      Take a road trip

Between the articles and their responses, it dawned upon me… I hadn’t sewn in over two weeks! I had been too busy with other projects around here that had to get done! Then, I was so tired or hands hurt too bad to do any sewing!

I have been sewing again for the experience… creating quilts and prayer flags (to be shared later, along with the story behind their creations).

Honestly, I’m still working on the “laugh more” aspect…

Oh, and I leave TOMORROW for a road trip with my 87 year old mother, and my sister!!! We are going on a quilt shop hop across North Texas! We all are so excited!!!


…I’m already feeling emotionally healthy once again!

Life is good!


Thursday, September 1, 2016

Sew for the experience of it!

Yes! It’s that time of year again! This year’s focus is going to be a fun one: 

“Sew for the experience of it!”

I love the Sewing & Craft Alliance, in partnership with the American Sewing Guild, selected this theme! For more information about the origin of National Sewing Month, and its past celebrations, check out their website, National Sewing Month!

I haven’t a clue why, but when I saw their theme, my favorite childhood storybook came to mind. I guess because when Momma read it to me (over and over – at my request – until I could read it myself), it would fill me with all kinds of hope with all the possibilities of doing anything I wanted to do, if I worked hard at it!

At one time or another, I hope you’ve had the pleasure of reading the children’s book, The Little Engine That Could, by Watty Piper. It is a treasure!


Anyway, this month I will focus on sharing challenges for us to experience, to get us outside our comfort zone. I’m always looking for new techniques, methods, and projects to do that are different from my usual course of everyday sewing!

Like doing appliqué….
Like paper piecing…
Like working with mixed media…
Like… ???


I hope you will explore with me, the wonderful world of sewing – just for the experience of it!

...

Wednesday, March 23, 2016

Early Morning

In the wee early morning is when I love to sew. It is the quiet, prayerful time I thoroughly enjoy to start off my day. It’s before the day begins of doing routine chores like

cooking / eating,
maintenance,
(like dusting, laundry,
mowing and weed eating the acre yard,
and any gardening!)
helping others,
and continuing renovation projects to this 1918 house we may have underway.

Here of late my schedule’s been majorly off kilter. I touched on it in my last article. We should finish the floor installation today, the ninth day of hard labor! Then trim work begins.


Maybe today, we can get furniture placed somewhat where it will be and I can put the drawers back in my desk, the dishes back in the buffet, and books back on the book shelves, then resume some sewing! Keeping my fingers crossed! I’m sending prayers in the wind like the whispers I shared here.


Until then, if you’re looking for me I usually touch base on Facebook

Monday, January 11, 2016

It’s the Game Plan Anyway

When the light bulb goes off in my head, I get beside myself with excitement! However, it’s hard to wait for the actual implementation! I know it won’t happen anytime soon, but God willing it will happen in 2016! It may not be as exciting to you… but… I wanted to share…

I will have a dedicated sewing/quilting space!

We are turning a small bedroom into a room that I can walk out of, shut the door, and not have to move/rearrange anything on a daily basis when it’s winter time or summer time or totally remove things when overnight company visits! Praise the Lord!

I know it’s much larger than what some people manage with and I know I am blessed.

My mother has drawn to scale where I can put everything… including the longarm quilting frame!!!! Then we’ll get our living room back! Double plus!

I’m spending the time until it actually happens: 
  • Gathering storage/decorating ideas
  • Working through my stash of fabric

Speaking of my stash…
Going to push away from the computer and start continue working on it!

I hope everyone has a blessed day!

Monday, September 28, 2015

The Balaclava

A couple of years ago, during that year’s National Sewing Month the theme was: “Sew for the Skill of it!” It was then I wrote an article about sewing hats.

I shared some hats I made for my 18” dolls, and mostly lady hats – including a bonnet like my Grandmother would wear out in her garden, and I’ve been known to wear while mowing the acre yard! The one I’m going to make today, the Balaclava, is the most amazingly warm style head/neck covering I’ve ever worn! Although mine is a “store bought” one, it’s the first hat I grab when the weather turns bitterly cold.

The Balaclava is something I’d like to include in the messenger bag I created Saturday. I just know any homeless person would also thoroughly appreciate its warmth. Ever since I discovered fleece, I’m in love. It’s lightweight, yet WARM!

I went to Pinterest to find Balaclava patterns others have shared since 2013. Oh, my! Lots!

I appreciate the details provided by The Olive Leaf Journal, and her 3 possibilities of how to wear hers! Just love it!

Her photos and instructions look great!

But, with the “store-bought” Balaclava for a go-by, do I need a pattern? I’m going to try it…

 I got mine out of the coat closet, measured it (but why? I haven't a clue!) 


I took 2 layers of fleece and spread it out nicely (right sides together) then placed mine on top, spreading it out gently and carefully (the fabric will stretch)!

Then I cut around the "store bought" one, giving about an inch all the way around.


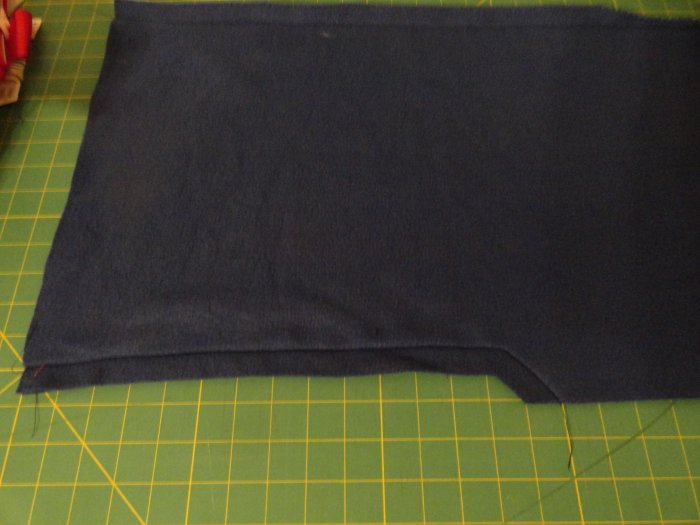
Before moving it from the cutting mat, I pinned the pieces together up the back and over the top of the hood part -


- and gave about an inch seam allowance. Then I "pinked" the crown part to reduce a little bulk - 


Next I pinned, then stitched the seam at the throat and under chin area...


I clipped the angle to almost the stitching line -


Matching the under chin seam, and the top of the head seam, I turned under about an inch hem allowance. Under chin area is a bit tricky and I just sort of eased it in... being careful not to stretch the fabric -


I found removing the part of my machine base - for putting in sleeves, etc., - worked wonderfully in stitching the hem area around the face section..


It didn't turn out too badly...

(NOTE: I decided not to put drawstrings in this one like my "store bought" one has.)

Working the bottom hem, I also turned under about an inch, starting first with matching the seams when turning under...

Actually, mine is a tad longer than the "store bought" one! And besides the drawstring, looks pretty much the same!

I tried it on and it fits the face and comes down on the neck wonderfully! I'm sorry, but it's much too early to put on makeup so you won't be seeing me modeling this!!!


Sometimes, it's a good thing to buy something, and then use it as a go-by to create another one!

Saturday, September 26, 2015

Messenger Bag for the Homeless

As I mentioned yesterday, there are a lot of free messenger bag patterns available online. This is what I did, not going into much detail, but let the pictures do the talking!

I wanted to make one quick, and as sturdy as possible.

I found some dark fabric my sister gave me, given to her out of a friend's grandmother's estate. I'm not sure what type of material may be mixed in with the cotton, but it's a nice weight.

I decided to cut it 14.5" tall. And, folded in half, I cut it at about 16" (which will be a long piece 32").
NOTE:  If you'd rather, feel free to cut 2 pieces at 16.5" wide - then take two seams up the sides, rather than the one for the middle front that I will make in a little bit.


I used a lightweight iron-on interfacing for the 14.5" x 32" piece and attached according to manufacturer's directions, and put it off to the side.

I then cut out fabric for the bag's lining... same size as the bag.

Then I made the flap..

I cut 2 pieces about 2.5" narrower than the one half of the bag (the 16"), and as long (14.5") as the bag.


I folded both pieces together in half lengthwise, then went to the kitchen and got a plate!


NOTE: I also used the lightweight iron-on interfacing on the flap, just for a bit of extra body.

I placed right sides together, and stitched all the way round leaving a nice opening at the straight edge.  


I used pinking sheers to cut close to the curved stitching lines, then trimmed the two corners with regular scissors.

NOTE: Used a scrap of batting to clean up all the fuzzy threads and trims off my cutting mat! It works just like a kitchen sponge cleaning off the countertop! It's great!

It was time to press stitches to meld, then turn right side out. To finish the opening, I folded inside the raw edges evenly with the seam line and secured with straight pins.

Setting aside the flap for the time being, I prepared the bag's lining:

First: stitch the ends together.
     Press to meld, press seam open.
     Center the seam line, press sides (to mark where they are!)

Mark (what will be the bottom) 1.5" ....


Cut!

Stitch across the bottom jog... (you can stitch the entire piece across the bottom, then cut out the jog... whichever works best for you!)


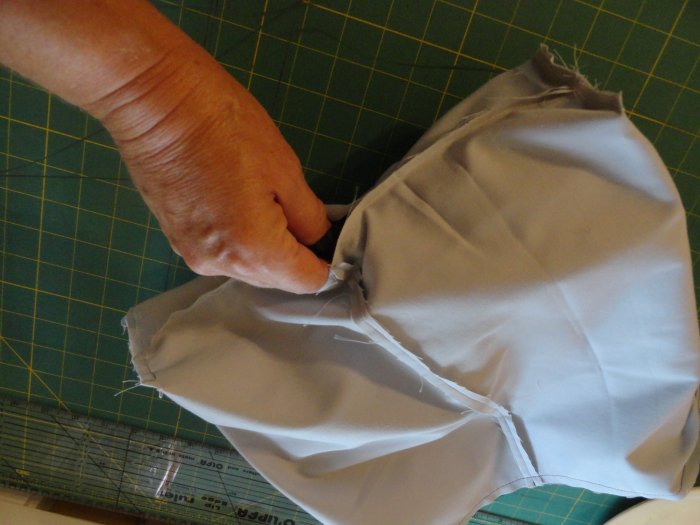
Line up the stitch line, with the press line, then pin and branch out, lining up the cut line...
on both sides... this makes the "gusset" like depth of the bag.


So, this bag's bottom will be 12"!

For the strap, I cut a piece 5" wide and way much too long (58")! You'll see a bit later how I had to "take it up" which will probably work out better anyway because it makes it stronger!

I folded over one side .5" and the other side about 1" then matched the folds. I top stitched along both sides, then again. Another photo later will show you what I'm talking about.


Then I made the "fashion" bag doing exactly the same thing as I did with the lining.

OOPS! I attached the flap down going the wrong way... see the picture below....


The only thing "correct" showing in the photo above is the fact that the flap is attached 1.5" below the raw top edge on the bag fabric and the flap's center is matched to the bag's center.

BUT, the flap should be going the same direction as my ruler! (You'll see how I "fixed" that later on!). Top stitch the flap to the bag twice. Yes. TWICE! We want it to stay attached!

Oh, I wanted to add a clip to the outside of the bag, so I used grosgrain ribbon and attached when I attached the straps.


 Now it's time to stuff the "fashion" bag (including strap & flap) inside the lining bag - objective: to get right sides together, matching seams, and side "pressing" marks.


I use a lot of pins!


 I take a bit larger seam allowance - about .5" give or take...


 Also, when I'm stitching over the straps, and the clip ribbon, I back stitch several times!


Yea! It's time to pull out the "fashion bag"... gently, a bit at a time!


It's coming!!!


I skipped several photo opts between the above and now below...


You can see, however, I top stitched around the bag twice to finish off the bag (so the lining's edge won't creep up). And, here, you'll see where I took a nice deep (about 6" worth) folded over of the strap inside and stitched it down. All those thicknesses is really rough on my machine, but she's a champ!


It wasn't until I took the final photo (coming up!) did I realize I initially
stitched the flap going in the wrong direction!
No big deal... I simply folded it over and top stitched it down.
One only knows if they look inside and see dark stitching across that area!
I don't think the homeless person would ever notice, or care,
or be concerned one bit that I messed up!

Ready to fill it up!!!


This took me about 3 hours... and that was with taking pictures along the way!  (This was the total - of course - over a long day of attending a Memorial Service, helping a friend, and doing things around the house. I would love 3 hours of nothing but uninterrupted sewing!) 

Also, it's been a while since I made one, at times I had to stop and think about things... the next one shouldn't take as long!

I would love to hear if you make one, a messenger bag for the homeless! 


Wednesday, September 16, 2015

Creating an Action Quilt - Part 8


Sewing the pieces together! 

Oops! I do need another piece! See the green mat showing about center of the Action Quilt!
Note: I've already stitched together the two pieces on the left... the white/purple to the green with a white corner.


No problem! It will be a perfect place to add a photo pocket! I cut some clear vinyl, and I'm adding a piece across the top, like a binding, like I did the red pet screen pocket the other day.


I'm using red terry cloth (like a towel) for the background. If you've never worked with vinyl before, I would highly recommend using a regular piece of 100% cotton, something sturdy. This terry stretched and I almost started over!


I pinned it to hold in place, not worrying about the extra hanging off at the bottom - I'll trim that later!


I stitched across the bottom first, then up the sides - all within the seam allowance.

PLEASE PLEASE PLEASE - keep your iron far far away from this vinyl! You can just imagine the mess you'll make on your iron, as well as the vinyl itself!!!


Now, back to sewing the pieces together. I did the top row first, then the second row.


Notice in the next photo how the left side (unit 1) is longer than unit 2!
No worry... I trimmed off a little at the top and the bottom!
Because I left room when I did the doo-dads, I have space to trim a little here and a little there.


Now I have to add the zipper unit across the entire bottom... it too extends past on the right end. Again, no problem!

Also, notice no seams join together. I do this on purpose because I don't want to have to worry about pressing seams one way or another. The seam allowance (pressed together rather than open) goes which ever way the doo-dads fit better without causing hardship. You'll understand "hardship" when you do this.

Most of the time, I "finger press" anyway.


I pin right sides together, making sure I don't stretch either unit.


I trim off the excess!


Remember my no rules/patterns... no ripping out? Do you notice what's different?
Yep! When I stitched the first unit upside down, I flipped it!
Do I rip out and turn it around? Nope!
Who will notice? Just you & I!!!!


It's a perfect size!


Tomorrow I'll share how I baste it together, and quilt it using my home sewing machine! First I need to figure out what backing fabric I'm going to use!

Oh, I just remembered, I need to now get the dental floss and stitch down that red button!
See you tomorrow!

Total Pageviews