Showing posts with label charity. Show all posts

Monday, March 29, 2021

Crochet for Others

I love to crochet. It keeps my hands busy and my mind occupied. But, there are just so many shawls, hats, afghans, or dollies, etc. I need/want! There are just so many loved ones that appreciate the effort of hours spent creating a crochet project.

I know I’m not alone. A lot of crochetists (like sewists) experience the heart stab when their efforts are ignored. The good news is - there are tenfold “strangers” that will welcome the love filled gift!

So where could I donate items?

The Spruce Crafts’ article “Charities that Accept Crochet Donations” provides 10 suggestions! This should get the juices flowing!

Also at Crochet Concupiscence I found another list of “Where to Donate Your Handmade Crochet Items” that offers additional suggestions.

Both above websites (oh, there are so many others) ended their lists with considering local needs…

Last month, Texas experienced an unprecedented 254 counties total shutdown hard freeze. I believe this was widely reported nationally and internationally so I won’t go into it here. I’m just thankful it’s over and I pray it never happens to us again. I’m sure each and every one of us learned a lot.

Although it’s too late now… it’s never too late to start…

Moving forward my focus will be to crochet for others unknown to me!

It is my plan to gather like-minded people in the community to also help create scarfs and hats along with me! We’ll collect them, then decorate the town streets with the goodies! I’ll contact the Warm Up America folks to officially organize a Made With Love event!

Will you join me?


Monday, May 8, 2017

Sunday


Sunday ~ yesterday ~ I got the urge to create a dress for a little girl. So I did. Although it’s for a little girl I don’t know, one I’ll never meet, I prayed for her the entire time.

It felt right. It was what I needed to do.

I absolutely love making things.

I love sewing for others.


Sewing for charity is a great way to spend a Sunday, and everyday!

Monday, January 9, 2017

Top 7 Articles of 2015

#7  Follow Your Heart


 …the words of Edward Everett Hale are a great mantra to keep playing in our minds:

I am only one, but I am one.
I cannot do everything,
but I can do something.
And I will not let what I cannot do
interfere with what I can do.
 Follow your heart and you’ll create with passion.


#6 Chair Bound


Seldom do I follow pattern directions. Well, this [wheelchair quilt] is certainly a prime example! This is also a good example how you can make things your own as well!


#5 Creating an Action Quilt - Part 9


....finishing up.I hope you've enjoyed this tutorial! I encourage you to make your own Action Quilt [Fidget Quilt] to give a Loved One with Alzheimer's Disease or dementia!


#4 Turning Scraps into Fabric


…try it!…adapting…


#3 Creating an Action Quilt – Part 1


…The Action Quilts (aka Fidget Quilts) I create are not for commercial facilities such as Nursing Homes or Adult Day Care Centers serving those with Alzheimer’s Disease or dementia. My focus is for those living in a home environment with a 24/7 caregiver.


#2 Action Quilt (aka Fidget Quilt)


…a friend called my attention to a newspaper article about a lady creating Fidget Quilts. La Mon knows me well…


And the NUMBER 1 Article is...

#1 Life with a 16 year old


Various websites state a Doberman has a life expectancy of 10-12 years. Some mention up to 13 years. We have a miracle living with us!

Monday, September 5, 2016

Labor Day - Labor of Love

According to the Department of Labor, Labor Day is…

…the first Monday in September, is a creation of the labor movement and is dedicated to the social and economic achievements of American workers. It constitutes a yearly national tribute to the contributions workers have made to the strength, prosperity, and well-being of our country.

Let’s give a High Five to our American Workers! We Can Do It!


There are a lot of folks here in the USA ~ and around the world ~ creating handmade items for others – a Labor of Love!

They / we sew for the experience of it, of giving what we can to honor, and to comfort.

There are a multitude of those giving from the heart ~ a labor of love ~ their creativeness, expertise, and devotion through making quilts, dresses, shorts, pillowcases, bags, and on and on for whatever the need may be! If you’re interested in helping – creating, donating, supporting – let me share a few!

On Facebook, you’ll find a wide variety of causes that would love (and appreciate) your support…

(They are “closed” groups – to keep out the riff-raff – but feel free to send a request to join if you’re interested in helping out!)

Melissa over at The Veterans Flag Quilt Challenge created a lovely quilt pattern and has made it available for free within her group!

Her description states:

This group is for those who love to quilt, love quilts, and those who love their country. You do not have to be a quilter to join. Feel free to share pics, tip and ideas (they don't have to be all about flags). This group was formed from a firestorm of support and request for this pattern. I am sharing it for free, this was the best way I knew how to do so. I decided to add the challenge to bring awareness to a great cause. Let’s keep the fire burning!! Accept the challenge make a quilt or donate you time or resources, support your Veterans! 

You’ll see others have created different designs as well… bottom line, it’s about our Veterans!

**********************************

I recently discovered Quilts for a Better Tomorrow…


Mary has figured out the pattern for this lovely quilt and has shared with us all (see “Files” for a document I created for us with all her instructions!). The goal is to get 50 quilts made by November 1st! Any color, your choice! What the group members have made so far, and have shared pictures of, are absolutely breathtaking!

She describes the group’s purpose:

Charity Quilts for the Homeless making a new start

I’m planning to pick up my four pieces during the upcoming shop hop *road trip! Then get it done as soon as I get back!

If all goes according to plan, the homeless will have new quilts soon after they move into The Cottages at Hickory Crossing, Dallas, Texas!

**********************************

And, I would be amiss if I did not share again my group Lone Star of Texas Quilts for Others! We make quilts for anyone, those to honor, and those in need of comfort.

Lone Star of Texas Quilts for Others is a place for like-minded folks to gather while creating quilts for others! As we journey through National and Community based service endeavors, we offer support and encouragement to one another.

I’m excited to help…

I love the process of creating quilts for others, or quilting a project someone else made for a special someone. It just makes my day!

Will you join in the endeavor ~ our Labor of Love?


*road trip – stay tuned! Set for departure Tuesday, September 13th!

Friday, September 2, 2016

Save the Date!

I wanted to give everyone a heads-up! The American Patchwork & Quilting magazine’s
1 Million Pillowcase Challenge
continues!

Save the date!

September 16 – 17
for their 3rd annual Sewathon 24-hour Marathon!


After doing a search here on my blog for “pillowcase” (because I know I’ve shared how to do the roll-up method before), I also saw that I’ve shared about their challenge since the beginning! Back in 2013, their mission was listed among the Community Sewing organizations I suggested!

The basic pillowcase is sew easy to stitch up! If you want to create some fun and really creative pillowcases, click here for free patterns and ideas!

The thing about this mission, you donate the pillowcases to the charity or cause of your choice! For which charity/cause will you donate the pillowcases? My heart is leaning toward the flood victims in south Louisiana. Bless their hearts. Such tragedy.

As of this writing, APQ’s website reports they have almost 690,000 pillowcases toward their 1 Million Pillowcase Challenge! How fabulous is this?!!?! With our help, this just may be the year they hit the 1 Million mark!

Stay up-to-date with all the going on’s by liking their Facebook page!


And, don’t forget to log your numbers on their site! (Click here to learn how to update the pillowcase counter.) Let’s help them reach their goal this year! Will you gather a group together? Will you make some on your own?

Check out the stories, and see the various small/large groups that have contributed to this mission! Be sure to add your own story!


Wednesday, September 30, 2015

Will Never End!

National Sewing Month 2015 comes to an end today. Their focus this year ~ Sew for the Charity of it! ~ doesn’t end, sewing for charity will never end! We have too much to do for others!

Remember what I shared during the first week…

I am only one, but I am one.
I cannot do everything,
but I can do something.
And I will not let what I cannot do
interfere with what I can do.
Edward Everett Hale


It is my hope I’ve inspired and encouraged you to create something for a charity (or two or three)!

Until next time!


Monday, September 28, 2015

The Balaclava

A couple of years ago, during that year’s National Sewing Month the theme was: “Sew for the Skill of it!” It was then I wrote an article about sewing hats.

I shared some hats I made for my 18” dolls, and mostly lady hats – including a bonnet like my Grandmother would wear out in her garden, and I’ve been known to wear while mowing the acre yard! The one I’m going to make today, the Balaclava, is the most amazingly warm style head/neck covering I’ve ever worn! Although mine is a “store bought” one, it’s the first hat I grab when the weather turns bitterly cold.

The Balaclava is something I’d like to include in the messenger bag I created Saturday. I just know any homeless person would also thoroughly appreciate its warmth. Ever since I discovered fleece, I’m in love. It’s lightweight, yet WARM!

I went to Pinterest to find Balaclava patterns others have shared since 2013. Oh, my! Lots!

I appreciate the details provided by The Olive Leaf Journal, and her 3 possibilities of how to wear hers! Just love it!

Her photos and instructions look great!

But, with the “store-bought” Balaclava for a go-by, do I need a pattern? I’m going to try it…

 I got mine out of the coat closet, measured it (but why? I haven't a clue!) 


I took 2 layers of fleece and spread it out nicely (right sides together) then placed mine on top, spreading it out gently and carefully (the fabric will stretch)!

Then I cut around the "store bought" one, giving about an inch all the way around.


Before moving it from the cutting mat, I pinned the pieces together up the back and over the top of the hood part -


- and gave about an inch seam allowance. Then I "pinked" the crown part to reduce a little bulk - 


Next I pinned, then stitched the seam at the throat and under chin area...


I clipped the angle to almost the stitching line -


Matching the under chin seam, and the top of the head seam, I turned under about an inch hem allowance. Under chin area is a bit tricky and I just sort of eased it in... being careful not to stretch the fabric -


I found removing the part of my machine base - for putting in sleeves, etc., - worked wonderfully in stitching the hem area around the face section..


It didn't turn out too badly...

(NOTE: I decided not to put drawstrings in this one like my "store bought" one has.)

Working the bottom hem, I also turned under about an inch, starting first with matching the seams when turning under...

Actually, mine is a tad longer than the "store bought" one! And besides the drawstring, looks pretty much the same!

I tried it on and it fits the face and comes down on the neck wonderfully! I'm sorry, but it's much too early to put on makeup so you won't be seeing me modeling this!!!


Sometimes, it's a good thing to buy something, and then use it as a go-by to create another one!

Saturday, September 26, 2015

Messenger Bag for the Homeless

As I mentioned yesterday, there are a lot of free messenger bag patterns available online. This is what I did, not going into much detail, but let the pictures do the talking!

I wanted to make one quick, and as sturdy as possible.

I found some dark fabric my sister gave me, given to her out of a friend's grandmother's estate. I'm not sure what type of material may be mixed in with the cotton, but it's a nice weight.

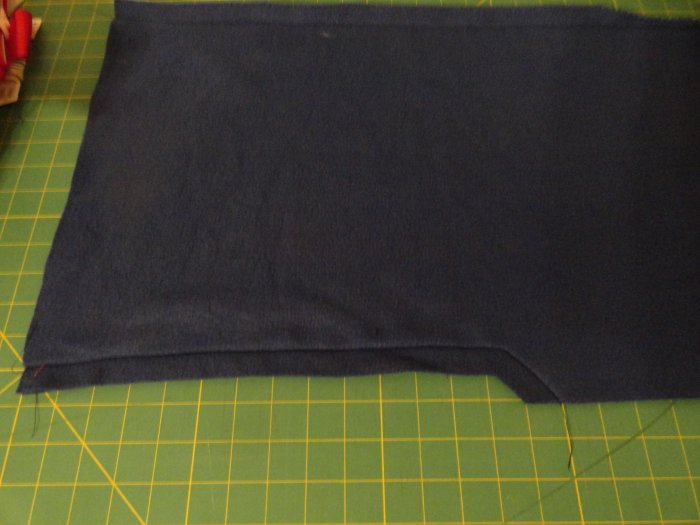
I decided to cut it 14.5" tall. And, folded in half, I cut it at about 16" (which will be a long piece 32").
NOTE:  If you'd rather, feel free to cut 2 pieces at 16.5" wide - then take two seams up the sides, rather than the one for the middle front that I will make in a little bit.


I used a lightweight iron-on interfacing for the 14.5" x 32" piece and attached according to manufacturer's directions, and put it off to the side.

I then cut out fabric for the bag's lining... same size as the bag.

Then I made the flap..

I cut 2 pieces about 2.5" narrower than the one half of the bag (the 16"), and as long (14.5") as the bag.


I folded both pieces together in half lengthwise, then went to the kitchen and got a plate!


NOTE: I also used the lightweight iron-on interfacing on the flap, just for a bit of extra body.

I placed right sides together, and stitched all the way round leaving a nice opening at the straight edge.  


I used pinking sheers to cut close to the curved stitching lines, then trimmed the two corners with regular scissors.

NOTE: Used a scrap of batting to clean up all the fuzzy threads and trims off my cutting mat! It works just like a kitchen sponge cleaning off the countertop! It's great!

It was time to press stitches to meld, then turn right side out. To finish the opening, I folded inside the raw edges evenly with the seam line and secured with straight pins.

Setting aside the flap for the time being, I prepared the bag's lining:

First: stitch the ends together.
     Press to meld, press seam open.
     Center the seam line, press sides (to mark where they are!)

Mark (what will be the bottom) 1.5" ....


Cut!

Stitch across the bottom jog... (you can stitch the entire piece across the bottom, then cut out the jog... whichever works best for you!)


Line up the stitch line, with the press line, then pin and branch out, lining up the cut line...
on both sides... this makes the "gusset" like depth of the bag.


So, this bag's bottom will be 12"!

For the strap, I cut a piece 5" wide and way much too long (58")! You'll see a bit later how I had to "take it up" which will probably work out better anyway because it makes it stronger!

I folded over one side .5" and the other side about 1" then matched the folds. I top stitched along both sides, then again. Another photo later will show you what I'm talking about.


Then I made the "fashion" bag doing exactly the same thing as I did with the lining.

OOPS! I attached the flap down going the wrong way... see the picture below....


The only thing "correct" showing in the photo above is the fact that the flap is attached 1.5" below the raw top edge on the bag fabric and the flap's center is matched to the bag's center.

BUT, the flap should be going the same direction as my ruler! (You'll see how I "fixed" that later on!). Top stitch the flap to the bag twice. Yes. TWICE! We want it to stay attached!

Oh, I wanted to add a clip to the outside of the bag, so I used grosgrain ribbon and attached when I attached the straps.


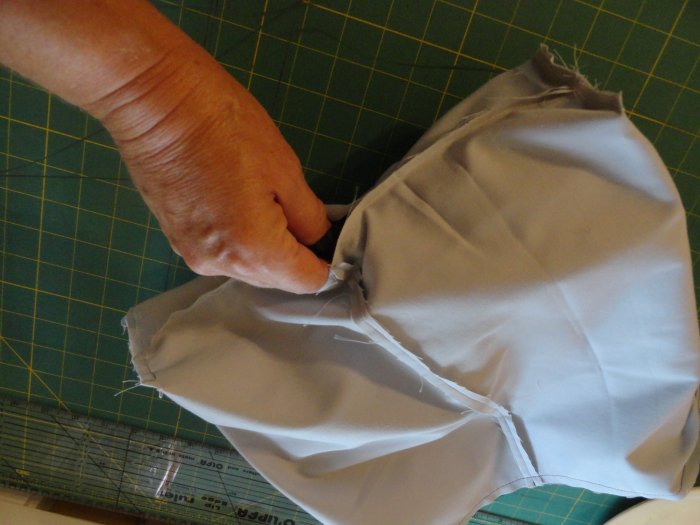
 Now it's time to stuff the "fashion" bag (including strap & flap) inside the lining bag - objective: to get right sides together, matching seams, and side "pressing" marks.


I use a lot of pins!


 I take a bit larger seam allowance - about .5" give or take...


 Also, when I'm stitching over the straps, and the clip ribbon, I back stitch several times!


Yea! It's time to pull out the "fashion bag"... gently, a bit at a time!


It's coming!!!


I skipped several photo opts between the above and now below...


You can see, however, I top stitched around the bag twice to finish off the bag (so the lining's edge won't creep up). And, here, you'll see where I took a nice deep (about 6" worth) folded over of the strap inside and stitched it down. All those thicknesses is really rough on my machine, but she's a champ!


It wasn't until I took the final photo (coming up!) did I realize I initially
stitched the flap going in the wrong direction!
No big deal... I simply folded it over and top stitched it down.
One only knows if they look inside and see dark stitching across that area!
I don't think the homeless person would ever notice, or care,
or be concerned one bit that I messed up!

Ready to fill it up!!!


This took me about 3 hours... and that was with taking pictures along the way!  (This was the total - of course - over a long day of attending a Memorial Service, helping a friend, and doing things around the house. I would love 3 hours of nothing but uninterrupted sewing!) 

Also, it's been a while since I made one, at times I had to stop and think about things... the next one shouldn't take as long!

I would love to hear if you make one, a messenger bag for the homeless! 


Total Pageviews