Showing posts with label National Sewing Month. Show all posts

Saturday, September 23, 2017

First Full Day of Fall - 2017


Fall began yesterday afternoon. Already.

Finally.

I’m looking forward to cooler days, and praying for a bit of much needed rain.

Although September is National Sewing Month, something I’ve “celebrated” in years past with a daily blog article, this year caught me off guard!

I found their theme: “Sew for the Beauty of it” perplexing!


I don’t decide the theme. In partnership with the American Sewing Guild, National Sewing Month is presented by the Sewing & Craft Alliance. They make the decision of what to focus upon.

Back in the summer, I discovered the theme for 2017. It was then I began to ponder, gather, and prepare what I wanted to share throughout September. I love celebrating the act of sewing!

I found the prior years easy:


However, this year’s theme “Sew for the Beauty of it” was certainly thought provoking! It’s not easy!

I reached out to family and friends on Lanetta’s Creations Facebook page and a couple of groups, asking what “Sew for the Beauty of it” meant to them…

Some feedback I received:

Sherry answered:

Beauty of the craft, history, art, further generations, love, most is beauty of giving and making. And beauty of the heart that’s put into it.

Valarie wrote:

The beauty of the end result but also the beauty of the process that results in that end result. And can't forget the beauty of the souls who make crafts and share their art with others!

Linda shared:

One way it would have meaning to me is: The sewn project provides a visual time of pleasure in looking at the final result. During the sewing of an item… the touching of the fabric and putting the seams together brings satisfaction in the completion of an item.

Pat replied:

It would encourage me to sew for the sheer pleasure or beauty of the experience and for the pleasure of the finished project.


“Sew for the Beauty of it.” 
What does that phrase mean to you?
How would/do you sew for the beauty of it?

Bottom line, it’s subjective. It is what one brings to the table…

Most unusual for me, I’ve not had the motivation to sew but one time so far this month. That was when my sweet Momma came to visit. She was a huge help organizing a couple of tubs filled with fabric. 


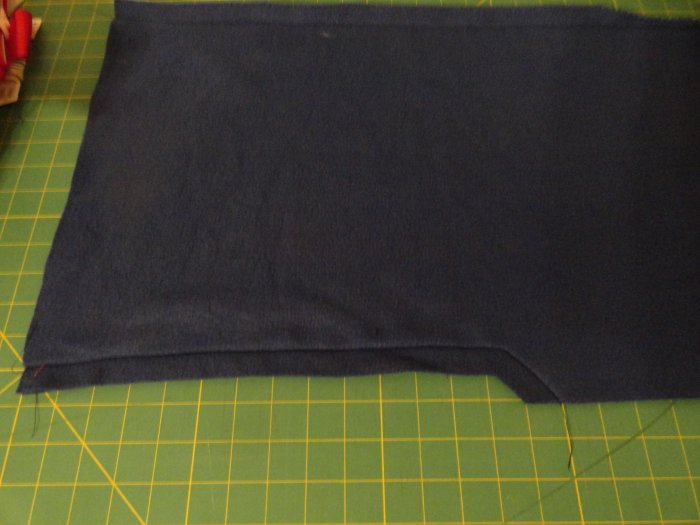
I got the 11th and final drawstring backpack done and all mailed out for the kids at Marty Indian School in South Dakota.

Too much going on to focus, even for the beauty of it.


Friday, September 30, 2016

Last Day! First Day!

Today ends this year’s National Sewing Month! I hope sewing for the experience of it continues for us all! It’s been a fun rewarding month of new adventures and techniques I’ve tried or have put on my bucket list! How about you?


Oh, and The State Fair of Texas opens today – through 10/23/2016!!!

If you’re looking for me, I’ll be at Thomas Sewing Center in Mesquite, Texas! They have such lovely fabrics, and oh… the… sewing, embroidery, longarm machines… what will be left in the store that is, as most will be at the Fair!


If you’re heading out to the Fair, check out their booth, located in the Grand Place building directly behind Big Tex!

I’ve already started my sewing to-do list for when I get back to the country after spending this next week helping out at Thomas’s! I’m certain the exposure in a lovely shop will fill me with even more ideas, not to mention supplies!


Remember, sewing for the experience of it benefits others, as well as us! 

Thursday, September 1, 2016

Sew for the experience of it!

Yes! It’s that time of year again! This year’s focus is going to be a fun one: 

“Sew for the experience of it!”

I love the Sewing & Craft Alliance, in partnership with the American Sewing Guild, selected this theme! For more information about the origin of National Sewing Month, and its past celebrations, check out their website, National Sewing Month!

I haven’t a clue why, but when I saw their theme, my favorite childhood storybook came to mind. I guess because when Momma read it to me (over and over – at my request – until I could read it myself), it would fill me with all kinds of hope with all the possibilities of doing anything I wanted to do, if I worked hard at it!

At one time or another, I hope you’ve had the pleasure of reading the children’s book, The Little Engine That Could, by Watty Piper. It is a treasure!


Anyway, this month I will focus on sharing challenges for us to experience, to get us outside our comfort zone. I’m always looking for new techniques, methods, and projects to do that are different from my usual course of everyday sewing!

Like doing appliqué….
Like paper piecing…
Like working with mixed media…
Like… ???


I hope you will explore with me, the wonderful world of sewing – just for the experience of it!

...

Wednesday, September 30, 2015

Will Never End!

National Sewing Month 2015 comes to an end today. Their focus this year ~ Sew for the Charity of it! ~ doesn’t end, sewing for charity will never end! We have too much to do for others!

Remember what I shared during the first week…

I am only one, but I am one.
I cannot do everything,
but I can do something.
And I will not let what I cannot do
interfere with what I can do.
Edward Everett Hale


It is my hope I’ve inspired and encouraged you to create something for a charity (or two or three)!

Until next time!


Monday, September 28, 2015

The Balaclava

A couple of years ago, during that year’s National Sewing Month the theme was: “Sew for the Skill of it!” It was then I wrote an article about sewing hats.

I shared some hats I made for my 18” dolls, and mostly lady hats – including a bonnet like my Grandmother would wear out in her garden, and I’ve been known to wear while mowing the acre yard! The one I’m going to make today, the Balaclava, is the most amazingly warm style head/neck covering I’ve ever worn! Although mine is a “store bought” one, it’s the first hat I grab when the weather turns bitterly cold.

The Balaclava is something I’d like to include in the messenger bag I created Saturday. I just know any homeless person would also thoroughly appreciate its warmth. Ever since I discovered fleece, I’m in love. It’s lightweight, yet WARM!

I went to Pinterest to find Balaclava patterns others have shared since 2013. Oh, my! Lots!

I appreciate the details provided by The Olive Leaf Journal, and her 3 possibilities of how to wear hers! Just love it!

Her photos and instructions look great!

But, with the “store-bought” Balaclava for a go-by, do I need a pattern? I’m going to try it…

 I got mine out of the coat closet, measured it (but why? I haven't a clue!) 


I took 2 layers of fleece and spread it out nicely (right sides together) then placed mine on top, spreading it out gently and carefully (the fabric will stretch)!

Then I cut around the "store bought" one, giving about an inch all the way around.


Before moving it from the cutting mat, I pinned the pieces together up the back and over the top of the hood part -


- and gave about an inch seam allowance. Then I "pinked" the crown part to reduce a little bulk - 


Next I pinned, then stitched the seam at the throat and under chin area...


I clipped the angle to almost the stitching line -


Matching the under chin seam, and the top of the head seam, I turned under about an inch hem allowance. Under chin area is a bit tricky and I just sort of eased it in... being careful not to stretch the fabric -


I found removing the part of my machine base - for putting in sleeves, etc., - worked wonderfully in stitching the hem area around the face section..


It didn't turn out too badly...

(NOTE: I decided not to put drawstrings in this one like my "store bought" one has.)

Working the bottom hem, I also turned under about an inch, starting first with matching the seams when turning under...

Actually, mine is a tad longer than the "store bought" one! And besides the drawstring, looks pretty much the same!

I tried it on and it fits the face and comes down on the neck wonderfully! I'm sorry, but it's much too early to put on makeup so you won't be seeing me modeling this!!!


Sometimes, it's a good thing to buy something, and then use it as a go-by to create another one!

Tuesday, September 22, 2015

Love the Idea!

Remember back, during the first week of National Sewing Month, when I wrote about adding my own flare to something I’ve seen others create? Well, I’m doing it again!

I stumbled upon the idea of a Fidget Book the other day. Of course, I would refer to them as an Action Book for adults with Alzheimer’s Disease, dementia, or traumatic brain injury. As I’ve mentioned before, “Fidget” is a derogatory term in my mind.

I’ve never created a “fabric book” before! Of course, I did a google.com search first, then moved to Pinterest to gather some ideas! Oh. My. Goodness. I found LOTS of fabulous ideas!

Not being blessed with having children, through this search I learned the term “Quiet Books” - that is, those that are for children! But, I did find lots of additional ideas (that I pinned) of how and what to incorporate that can be used for adults!

Lella Boutique shares a wonderful photo tutorial on the basic book structure. It’s for a little boy, but can you just imagine doo-dads for an adult – like I do on an Action Quilt??!!! This example has frayed edges…


I’m thinking I want a smooth, finished edge… but how to join together? I really don’t want to use rings, but maybe I’ll have to rather than stitch it together – depends on how thick it is.


BINGO!

Pictures are worth a 1000 words…
Although I found on Pinterest, a website in Russian (I’m sure google would have translated), Baby Blog shared lots of photos that speak VOLUMES!

I believe “Mother Load” is another saying that fits the bill here!


Now, my creative juices are flowing… I’ll figure it out!

Monday, September 21, 2015

Become a Superhero!

The beginning of September, when Sew for the Charity of It! celebration began, I suggested to find a cause, or two, or three, and begin sewing, creating handmade items to give to those needing comfort.

I couldn’t pass up not sharing something I recently discovered! Oh, my! The Enchanted Makeovers’s Capes for Kids mission!

“Transforming Shelters for Women and Children from Surviving to Thriving Spaces”


This fabulous non-profit organization believes:

Capes for Kids represents hope. Since every cape is unique and handmade with love, each child who receives one will feel their own superpowers, and know that they have the strength and ability to create whatever they want for their lives.Sending Hope, Faith, and Love to Children Living in Shelters Across the Country.

As children, we often play “dress up”. But beyond just having fun, the clothing or costumes we put on our body send us a message.

Many children play “Superhero” because the messages that Superheroes “save the day” is everywhere, but Enchanted Makeovers believes it’s not about calling on “superman” or “supergirl” to swoop in.

It's about calling on our own strength, from within, that we never knew we had. It’s about the power of our minds, tapping into our imaginations. 

It's about putting on our daily armor and believing in ourselves.When our programs were being developed, the goal was to teach the children life skills as well as coping skills. The power of imagination is infused throughout. As Dr.Victor Frankl, the author of Man’s Search for Meaning pointed out, when you can imagine survival, you will survive. For the children, the “Capes for Kids” program ignites the imagination and creativity.

As a kid, did you play dress-up? I certainly did!

I made a cape for one of the grandson’s several years ago… it’s from Papa’s recycled t-shirt. It was when the youngest was into Batman. Because he lives in Dallas, and we live on the ranch, this is the only time – since the birthday – we saw him in the cape!

What about joining the Capes for Kids program? Or, simply make capes for kids living in your local  family shelter!

On the Parents.com website, and was published in the December/January 2014 issue of FamilyFun magazine, they’ve teamed up with Enchanted Makeovers for this campaign. They also have a free, simple cape pattern.

Limitations live only in our minds.
But if we use our imaginations,
our possibilities become limitless.
~ Jamie Paolinetti


What an amazing project to be involved in ~ helping kids find their empowerment through imagination!

I’m going to go make a cape… or two, or ten! Will you?

Friday, September 18, 2015

Sew-A-Thon Marathon Starts Today!

American Patchwork & Quilting sponsors the 1 Million Pillowcase Challenge for charity. This year, during National Sewing Month, they are having a 24 Hour Sew-A-Thon event starting today! How many can / will you make in 24 hours?


I read about how one group is getting together in person, and Girl Scouts are coming to work on the pillowcases! This activity counts toward their Bronze Award community service project. What a wonderful way to give back to the community.

All People Quilt has a list of ideas of where to donate pillowcases found here.

They also provide free patterns to get fancy when creating pillowcases!

I wrote a tutorial back in 2012 and shared step-by-step pictures how to create a “roll” pillowcase. It’s easy! I listed the fabric requirements there as well!


Anytime today… it’s never too late to start… you have 24 hours…. Ready… Set… Go!

Thursday, September 17, 2015

Creating an Action Quilt - Part 9

Backing - Quilting - Binding on an Action Quilt

I cut the batting about 2" larger than the top - all the way around:


I cut the backing at least an inch bigger all the way around than the backing:


I took only the batting outside, and laid it out on a leftover styrofoam thingy that was packing from something we had to recently buy ~ a new air conditioner (window unit). I highly recommend doing this OUTSIDE (out of the wind) and any surface will work, but know the basting spray will get on everything and it's very sticky!!!

(This is what I use, from Walmart, Dritz Basting Spray)


I carefully carried back inside, and placed it down on the wrong side of the backing, smoothing it out nice and carefully. You do have a little time to make adjustments if necessary:


After the basting spray dried a little, I started pinning the top to the backing/batting set:


You can't really see the "quilting" stitches from the front side...


Maybe you can see it a bit better from the back side:


Now it's time for the binding!

Prepare binding as you would any other quilt.

I cut 2.5 inch wide strips and sew together on the diagonal to make the length needed. I then fold in half and press the length of the binding. On one end, I press a 45 degree angle and that's the end I start with. To determine length needed, measure sides and ends, 14.5, 14.5, 18.5, 18.5 = 66   / 36 = 1.8333 yards of binding needed.


I've learned several things since I posted last September for National Sewing Month - making a quilt top...

A friend of mine shared not to trim the backing and batting close to the top until AFTER I do the first stitching down of the binding. Oh. My. Goodness. Does it ever go quicker and makes a nicer application! Again, Thank You, Dianna!


Any, and all, of my quilts, I start the binding on the lower left side. Somewhere, another lifetime ago, a training class for creating effective newsletters, I learned the lower left side is a blind side... the eyes go every where else first!


Once the binding is stitched down, I then trim off the excess backing and batting.


After pinning down (I love these clips!), I'm ready to stitch the final trek around the Action Quilt.
Here is another trick I've learned this year from a friend... use a zipper foot!!! I love this! I can adjust my needle to run right along the edge of the binding. Thank you again, Ann!


The Action Quilt is DONE! And, it's gone through the laundry cycle perfectly!!!


I hope you've enjoyed this tutorial! I encourage you to make your own Action Quilt to give a Loved One with Alzheimer's Disease or dementia! It will surely put a smile on their face!

I hope you share pictures!!!

Thursday, September 3, 2015

Finding Patterns

Hopefully, you are participating in National Sewing Month’s “Sewing for the Charity of it” and have selected a charity! Let’s get focused! I did a Google search for “Sewing for Charity” and found boo-coos of free patterns! Another search, for "Sew to Serve" offers more suggestions and links to free downloadable patterns. I also found several from my search on Pinterest under "Charity Sewing".


It is one stitch at a time that we – all the sewists celebrating National Sewing Month in creating items for charity – will change a life.

What will you create? Which pattern(s) did you select?

I hope you share as I would love to know!


Tuesday, September 1, 2015

National Sewing Month

Welcome to September! Which brings ~ once again ~ National Sewing Month!


National Sewing Month celebrates home sewing. You will find an informative .pdf file here about the history of National Sewing Month. This year’s theme is “Sew for the Charity of it!” – what a great focus!

If you don’t know how to sew, this is a great time to learn how! If you already sew, I would like to encourage you to join me in sewing for others – for the charity/love of it!

Out of curiosity, I went to the online dictionary and looked up charity – just to be clear. This is what I found:

noun, plural charities.

1. generous actions or donations to aid the poor, ill, or helpless:
to devote one's life to charity.
2. something given to a person or persons in need; alms:
She asked for work, not charity.
3. a charitable act or work.
4. a charitable fund, foundation, or institution:
He left his estate to a charity.
5. benevolent feeling, especially toward those in need or in disfavor:
She looked so poor that we fed her out of charity.
6. leniency in judging others; forbearance:
She was inclined to view our selfish behavior with charity.
7. Christian love; agape.

Simple, basic.


What can we sew/create for others? Throughout the month, I’ll share ideas and suggestions I find across the internet! Check back daily for the discoveries!

Tuesday, March 3, 2015

Bite Size Pieces

Are you interested in making a quilt, but find quilt blocks intimidating? Well, some are for sure! When I look at award winning quilts at the State Fair of Texas, and online, many are certainly far above my skill level! However, I don’t let that stop me from creating others, less complicated yet beautiful, quilts!


September of last year, during National Sewing Month, I posted daily articles focused on making quilt tops. “It’s that time again” begins the series. Click “newer post” at the bottom to read the next day, then so on and so forth. 

Anyway, I met Linda M. while working the Elections. She and I worked together several days during the early voting period one year. Because of the low number of voters coming in, we had a bit of “down time” between citizens exercising their right. I had brought several quilting magazines. I believe she brought a crossword book ~ I’m not sure ~ because we both ended up looking through my magazines, together!

NOTE: Please cast your vote when the time comes!

Linda shared she hadn’t really done much sewing since her now grown children were young. She does beautiful embroidery/cross-stitch work – as she brought a “show and tell” piece one day. While looking through the magazines, it was fun hearing her recall how many of the designs brought back memories of quilts her mother had created.

She commented on a quilt she saw, something about it being too difficult for her to ever create. I took a pencil, drew hard lines around each block, and suggested, “Break it down into bite size pieces.”

I could see the light bulb going off!

This is my process when I see a “free” quilt pattern. Because of having limited bandwidth issue, I cannot download patterns. So, I print off a sheet of graph paper, sharpen my pencil, find a straight edge, and go to work. Although I have a picture, I need to “see” the block on graph paper.

So, the next time you see a fabulous quilt, break it down into bite size pieces to see how it is put together. Make a spin off, to make it your own!


When you’re ready to create a quilt, I found an amazing site chalked full of invaluable information at about home. I highly recommend it, even for the experienced quilter!

Tuesday, September 30, 2014

It’s a Wrap!

If you’ve followed along during 2014’s National Sewing Month, I’ve concentrated on creating a quilt top. If you’ve made one this month ~ or anytime ~ you know it’s not quite a “wrap” ~ yet! There are a few more steps before you, or anyone, can wrap up in your handmade with love quilt!


But, it’s a wrap for me, for this month-long daily post series!

Of course, it’s not a quilt until it’s quilted, then binding set in place! Oh, and don’t forget to apply a label telling your name as the piecer (and the name of the quilter, if different), the date (I use date finished!), your city/state, and anything else you want to share – like maybe washing instructions. Trust me! Decades later folks will want to know about you and the quilt's process!

Until the top is quilted, remember to always fold so that the right side is out. This protects the cut edges from raveling out from all the little pieces sewn together!

(The bold words below are what I used in my goodsearch.com search to find a link to share with you! I’m sure you can find other great resources as well!)

There are three ways to turn a top into a quilt…

Hand quilt Sew Mama Sew
Home machine quiltQuilt Bug 
Longarm Quilting Services – depends on your location…


The Next Step – apply binding Hope Yoder 

One of mine, in the process of sewing on the binding!

The Finishing Step – adding a quilt labelCreative Bug 


But then, sometimes the quilt will hang on display ~ make a quilt sleeveTallgrass Prairie Studio 
 
An example of one of mine: A stitched-in sleeve pocket for a wall hanging

Oops, a few things I failed to mention before…

  1. On the Stitched in Color’s website, you’ll find a great informative article on Choosing Fabrics. Among several points, Rachel talks about scale and value – something to think about!  
  1. Sew Red Glasses “Color Value Made Simple” is a relatively new product that does indeed help with color values! I love mine!  
  1. When sewing most everything besides quilt pieces together, we backstitch a few stitches at the beginning and then at the end of a seam. Never backstitch (beginning or end) when piecing pieces together for a quilt top!

I hope you found this series helpful and informative!


Wishing you all ~ Happy Quilting! 

Total Pageviews