Thursday, December 31, 2015

Daily Journal - I did it!

What do you do on this final day of the year? I try not to reflect too much. I would rather focus on the now and what tomorrow may bring. Sometimes, however, I can’t help myself.

I began a daily journal on December 8, 2014. And ~ wait for it ~ I have actually maintained it to this day! It’s not a “diary” like I had when I was young. No “feelings” are included – usually! I learned that lesson the hard way!

It is interesting to glance/read back over, to refresh my memory as to what I did throughout the year. Especially since I keep it on my computer in MSWord, I can easily do a “find” for key words.

For example, over the year, I wrote some form of the word “quilt” 342 times!

Okay, I counted the phrase “quilt quilted” as two “quilt” …

And, certainly Action Quilt (aka Fidget Quilt) also counted. Sometimes they take almost as much time as creating a lap size quilt top!

Anyway…

I’ve tried for years to maintain a daily journal. I’m excited I made it this year! I plan on continuing, especially now that I see the benefits of it helping me to remember what I’ve done. It’s like writing a story of my life. And, the older I get, the more help remembering I need!

For example, I'll share what I posted for yesterday:

Although I don't specifically share my "feelings"
- if you know me, a couple of entries reveal volumes!
Whether using the old fashion way with pen/paper, or computerized, I highly recommend keeping a daily journal! What you include, how detailed, or whether or not you include “feelings” is totally up to you. It’s a great habit to form. Yes. It is a habit, a good one!

I’ve read there are health benefits, when “feelings” are included. Maybe in 2016 I’ll journal more about this roller coaster called life!

For now, I’ll get back to the sewing room and finish a quilt top started a couple of days ago!

I pray 2016 brings you Peace and Joy.

Saturday, December 19, 2015

Life with a 16 year old

Various websites state a Doberman has a life expectancy of 10-12 years. Some mention up to 13 years. We have a miracle living with us!

Born July 2, 1999, Beth is 16, almost 16 1/2 years old! Each day is a blessing.

Every night, I give Beth an extra bit of loving while telling her, “Thank you for one more day.” Each morning we have, I ask her for a sweet kiss and she complies. It’s a fabulous way to start the day!

I give continuous thanks to God for our time together.

There are lifestyle changes, and sacrifices. It’s simply what you do when you are loving stewards of God’s gift.

Yes. There are senior issues to deal with on a daily basis. I’ve always heard for every year of a dog’s life (large breed) is 7 to people. That makes Beth 112 years old! Who would have thought! Certainly there will be issues… just clean it up and continue on with life!

Made it to Vet's and back (50 mile round trip)!
The hardest sacrifice we’ve made, since May of 2014, she’s not been able to ride in the truck for any length of time…

That means – she cannot make the three hour trip to Dallas.
That means – one of us stays home while the other goes and visits with family.
That means – one of us misses out on family celebrations such as birthdays, Christmas.
That means – we deal with it.  
I will give her kisses


And, live with knowing at any minute our time together will end.

My heart will never be ready.

UPDATE: It's hard to even write the words, but we had to help Beth cross the Rainbow Bridge on March 5, 2016 at 4:10 p.m.. Although not on this earth, she will be forever in our hearts.

Saturday, October 17, 2015

Turning Scraps into Fabric

Last week I stumbled upon a great article, Use Every Wee Bit and decided to try it! Well, my first attempt worked out sorta okay, but I had issues since I don't have an extension table next to my sewing machine! Threads kept falling off before I could stitch around the perimeter!

It's not too bad...


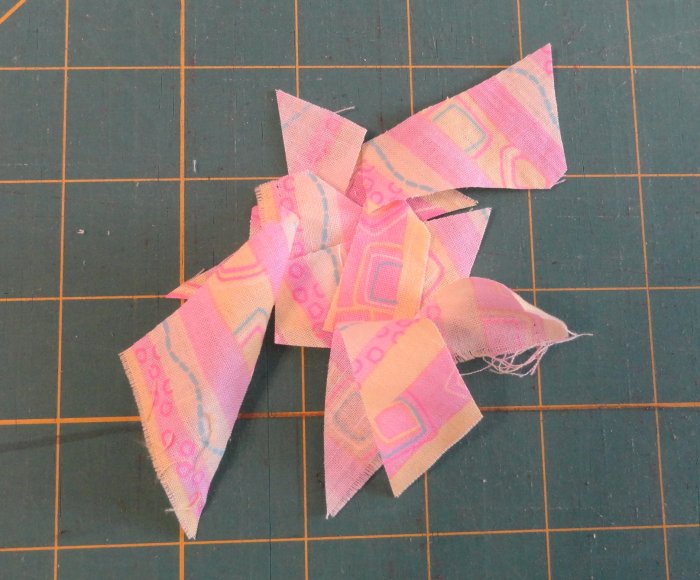
While sorting my stash of fabrics, looking for colors to match here and there, I came across itty bitty scraps left over from a doll quilt I made a couple of years ago.

I couldn't trash them, but I sure wasn't going to use the tiny squares and strips! So.... I thought about adapting Judith's instructions to make it a little easier for me! There's just so many ways I can hold my mouth to keep things all in line!

Just in case I missed a spot, rather than using muslin, I used a scrap of leftover backing from a quilt.

I gathered some pinks...


And, some blues...


I used (OUTSIDE) a bit of basting spray to the right side of the fabric, then placed the fabric on a piece of cardboard, gluey side up!


WORKING QUICKLY - before the basting spray drys, I placed the fabric pieces here and there...


Totally covered ~ just about ...

Cover with water soluble stabilizer...


Carefully take the "sandwich" over to the machine with stabilizer on top. Stitch around the edges, then stitch and stitch, and stitch more! I used dark thread on the bobbin so you could see it better...


Take to the sink and rinse and rinse and rinse out the stabilizer! 


I think it turned out rather nicely! Now I have 2 pieces of newly created made fabric to use with the main focus piece in the next Action Quilt!


BTW: Once the stabilizer is washed off & you think you need to add more stitching, no problem! Put on another piece of the stabilizer and go for it!!!

Monday, October 12, 2015

Print (or) PDF

I’m excited! I discovered a really cool widget today here and added it to my blog! Actually, it’s for you! If you ever want to print out a specific article or tutorial I’ve shared, simply click on the “Print PDF” button!


The program has a few glitches, but it’s worth a shot!


I went to the “Chair Bound” article and this is what it looks like, way down at the bottom:


Friday, October 9, 2015

Let Others Know!

In my blog articles, I focus on the positive. Providing inspirational ideas, creative suggestions to get the juices flowing, and thoughts to ponder, it is the reason I write. From comments left on my personal Facebook wall & Lanetta’s Creations page, and the handful left here, I know people stop by on occasion and read what I’ve shared.

That’s fabulous!

I’m wondering, though, what does it take to get folks to “share” one of my articles? Maybe they aren’t particularly interested in whatever it is I’ve created.

But, for example, a wheelchair quilt with a foot pocket ~ maybe one of their friends or family members may, if they knew about it!

Or, at least, want to know someone who could make one for a Loved One! ~~~~ Me!


When I share an Action Quilt (aka Fidget Quilt) I’ve made, it absolutely breaks my heart when I hear:

“I wish I had had one for my (insert Loved One) before (s)he died.”

Recently, I had a lady place an Action Quilt on her lap and fiddled with the different doo-dads. Tears filled her eyes as she told me, “Oh, I wish my Daddy had had this before he died.”


I’ve said it many times: I’m always late to the party.

But, I’m here now.

I just need to figure out how to get others that know, let others know!


Friday, October 2, 2015

Crossing the Cattle Guard

8:08 a.m.

Can you hear it?

That’s right! Nothing!

Yes!

Total amazing quietness surrounds me!

I even took out my hearing aid so I wouldn’t hear the girl’s toenails hit the floor while pacing around, looking for their daddy, or the leaves rustling against the breeze, or the newborn kittens in the front flowerbed crying for their momma – waiting for her to get back from hunting!

It’s been a wonderful 6 days, 5 nights with Momma here…

I’m so thankful we had the time together.

It’s now time to hit the floor running…
             After I have a relaxing cup of coffee…….

                      After I have a minute, or ten or thirty to absorb the quietness surrounding me.

Thursday, October 1, 2015

Good morning, October!

My 86 year young mother leaves in the morning after almost a week with us here at the ranch. It’s been a delightful visit, creating a host of memories I will treasure always. I posted a photo-journal of most of our daily events on Facebook. Through this album, I’ve shared with family and friends, and now you! It is such a blessing to have had this time with her.

Although I have a major custom order to finish (thankfully, the completion delay is understood), I have worked on it a bit while she has helped me tremendously by sorting through my trim stash!


That is, once she’s come inside from working on touching up the mural she created back in 1994ish!


Still, I’ve been having an internal fight with myself to not worry about the order, but to focus on Momma, and my time with her.

This is a total reminder… focus on the day…

And, that’s exactly what I’m going to do!

We’re crossing the cattle guard in a little while, heading south for our last outing before Bud takes her home tomorrow! We have errands to run and a fun meeting to attend this morning, then more errands!

I’ll let tomorrow take care of itself…

it usually does!

Wednesday, September 30, 2015

Will Never End!

National Sewing Month 2015 comes to an end today. Their focus this year ~ Sew for the Charity of it! ~ doesn’t end, sewing for charity will never end! We have too much to do for others!

Remember what I shared during the first week…

I am only one, but I am one.
I cannot do everything,
but I can do something.
And I will not let what I cannot do
interfere with what I can do.
Edward Everett Hale


It is my hope I’ve inspired and encouraged you to create something for a charity (or two or three)!

Until next time!


Tuesday, September 29, 2015

Dog Bone Pillow

It's been a long time since I've made a dog bone shaped pillow! I use one just about everyday while taking an afternoon (and evening) nap in my recliner! I have no idea where I put the pattern I used. I made several... one each for my elderly parents, and the one for myself.

I'm thinking other seniors, and the homeless, would also love a small little pillow like this.

I went online to find a pattern and happened across Apron Strings and Other Ties that Bind's tutorial straightaway.

I printed out two copies of her pattern design, trimmed the paper (with "paper" scissors) and joined them together at the center with tape as she directed. I then cut out the 4 pieces, snipping a bit at the end marks where she indicated on her pattern.

This is here where I went off her directions a bit. But, I did use the 1/2" seam allowance she recommends. Oh, also, I totally agree ~ I did NOT clip the inside seam allowance anywhere!

I pinned the right sides together of the two sets and stitched from the mark, to the mark, on each "unit". I also ~ according to her directions ~ back stitched when I started and stopped, being careful not to go beyond the mark.  


After pressing the stitches to "meld", I got my iron inside and pressed the seam flat on each unit.


This dog bone pillow will be given to the same homeless person I'll give the messenger bag I created the other day. Remember the latch hook I attached on the outside of the bag?!!! That's why I've pinned a grosgrain ribbon loop on the pillow! When not in use, the pillow can stay with the bag and not get lost!


I'm sorry I failed to take a picture of pinning the two set units together! Oops! My bad!

This is what I did: I opened up the two sets and placed right sides together, matching the marks, pinning all the way around the two set units. Because I have a tendency to start daydreaming while sewing, I wanted to go ahead and get the opening done. I started sewing at the top mark, then around to the narrow bone part and stopped, back stitched, then left about a 4" space, then started sewing again (back stitching when I started up again) and on around to the mark.

The final edge to stitch was then a snap! There wasn't anything I had to remember except using a 1/2" seam allowance rather than the "normal for me" 1/4" seam allowance!

Oh, when I stitched over the ribbon loop, I back stitched and straight stitched over it within the seam allowance several times!!!

I'm ready to stuff!


I'm ready to hand stitch the seam allowance at the opening closed and it's done!

My pitiful dog bone pillow... maybe I ought to make me a new one!
NOTE to SELF: When making this again, extend her pattern about 3" longer. 

Monday, September 28, 2015

The Balaclava

A couple of years ago, during that year’s National Sewing Month the theme was: “Sew for the Skill of it!” It was then I wrote an article about sewing hats.

I shared some hats I made for my 18” dolls, and mostly lady hats – including a bonnet like my Grandmother would wear out in her garden, and I’ve been known to wear while mowing the acre yard! The one I’m going to make today, the Balaclava, is the most amazingly warm style head/neck covering I’ve ever worn! Although mine is a “store bought” one, it’s the first hat I grab when the weather turns bitterly cold.

The Balaclava is something I’d like to include in the messenger bag I created Saturday. I just know any homeless person would also thoroughly appreciate its warmth. Ever since I discovered fleece, I’m in love. It’s lightweight, yet WARM!

I went to Pinterest to find Balaclava patterns others have shared since 2013. Oh, my! Lots!

I appreciate the details provided by The Olive Leaf Journal, and her 3 possibilities of how to wear hers! Just love it!

Her photos and instructions look great!

But, with the “store-bought” Balaclava for a go-by, do I need a pattern? I’m going to try it…

 I got mine out of the coat closet, measured it (but why? I haven't a clue!) 


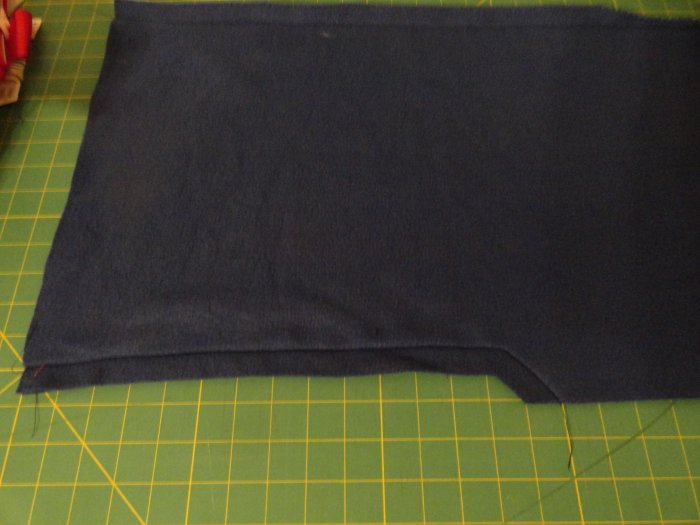
I took 2 layers of fleece and spread it out nicely (right sides together) then placed mine on top, spreading it out gently and carefully (the fabric will stretch)!

Then I cut around the "store bought" one, giving about an inch all the way around.


Before moving it from the cutting mat, I pinned the pieces together up the back and over the top of the hood part -


- and gave about an inch seam allowance. Then I "pinked" the crown part to reduce a little bulk - 


Next I pinned, then stitched the seam at the throat and under chin area...


I clipped the angle to almost the stitching line -


Matching the under chin seam, and the top of the head seam, I turned under about an inch hem allowance. Under chin area is a bit tricky and I just sort of eased it in... being careful not to stretch the fabric -


I found removing the part of my machine base - for putting in sleeves, etc., - worked wonderfully in stitching the hem area around the face section..


It didn't turn out too badly...

(NOTE: I decided not to put drawstrings in this one like my "store bought" one has.)

Working the bottom hem, I also turned under about an inch, starting first with matching the seams when turning under...

Actually, mine is a tad longer than the "store bought" one! And besides the drawstring, looks pretty much the same!

I tried it on and it fits the face and comes down on the neck wonderfully! I'm sorry, but it's much too early to put on makeup so you won't be seeing me modeling this!!!


Sometimes, it's a good thing to buy something, and then use it as a go-by to create another one!

Total Pageviews